Avoidance
Code
The source code and compilation instructions for this game can be found by cloning the following Git repository: https://sabadev.xyz/git/avoidance.git. Note that this path is not accessible through HTTP, and instead requires the use of a Git client to view the code.
To clone this repository, execute the following commands in your terminal:
git clone https://sabadev.xyz/git/avoidance.git
cd avoidance
git checkout -b main -t origin/main
The README file in this repository contains compilation and run instructions for the game.
Click here to view the code in your browser.
Overview
Back in high school, I wrote a game in around 60 lines of TI-BASIC on my TI-84 calculator.
It involved a user-controlled X (the player) pushing a 0 (a box) around while two θ characters (enemies) spawned in from the top and the left side of the screen to push the box out of bounds.
The objective was to keep the box on the screen for as long as possible.
The game proved to be quite popular, with random students approaching me to have me copy the code into their calculators.
With the ample free time I had due to the COVID-19 lockdown, I decided to remake this game for the command line. So in February of 2021, I spent a weekend creating the initial game. This was followed by some minor refactoring changes over the next couple of days to clean up the code.
Gameplay
In the TI-84 version of the game, there were only two enemies; one spawned at the top of the screen and moved in a straight line to the bottom, while the other spawned on the left side and moved to the right in the same fashion. As each enemy reached the other side, they would again spawn at a random position at their designated side and move to the opposite side.
With the larger screen size available in modern terminals, I decided to increase the complexity of the game. Instead of limiting the spawned enemies to single characters coming in from the top and left sides of the screen, the enemies now spawn in from any side of the screen and move to the opposite side in a straight line. Thus, a single enemy is not limited to spawning from the same direction every time.
I also replaced the original symbols used to represent each character with more intuitive versions. I replaced the player with P, the box with O, and the enemies with X, as seen in the screenshot below:
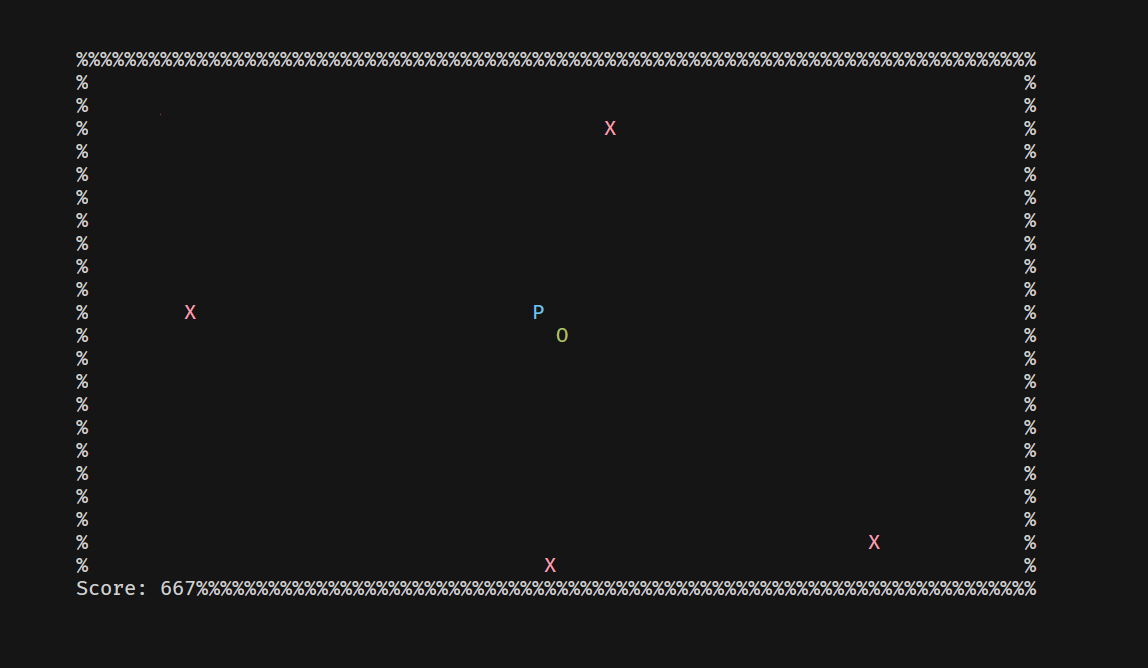
I also implemented a progressive difficulty system. The player's score continuously increases the longer the box stays on the screen. As the score increases, so does the number of enemies. The number of enemies available on the screen is governed by the following equation:
number of enemies = (score / 200) + 1
where / represents integer division.
Hence, a score of 50 would result in one enemy being available, while a score of 1050 would result in six enemies being available.
Implementation
Language Choice
I decided to write this game in Haskell to take advantage of its type safety, readability, and conciseness.
As a bit of an added challenge, I also opted to avoid using any GHC language extensions.
At the time of this writing, the src/Game.hs file contains only 233 lines of code.
Meanwhile, the app/Main.hs file contains only 6 lines of code.
This brings the total number of lines of production code to 239 lines.
Framework
To implement this game in the terminal, I opted for the excellent ansi-terminal-game framework.
This framework exposes a playGame function that takes in a configuration object specifying the game size, refresh rate, initial state, game logic function, draw function, and quit function.
Due to the signatures expected for these configuration functions, I was able to implement the entirety of the game logic without using the IO monad.
Data Representation
Character Types
This game features three types of characters:
- The player
- The box
- The enemies
Although the behavior and display of each character type is different, the core data held by each character is consistent across all three types. All we care about is the character's current position and the character's movement direction. However, we still want to distinguish between character types in order to avoid introducing logic errors where possible.
We can accomplish this using phantom types, as seen in the following code snippet:
import qualified Terminal.Game as G

data Player
data Box
data Enemy

data Character t = Character { entityCoords :: !G.Coords
                             , entityDirection :: !(Maybe Direction) }
The type variable t in Character t lets us supply a type such as Player to form the type Character Player.
What makes this a phantom type is that the type variable t is referenced only on the left-hand side of the data type declaration.
Although there is no difference in the data contained within Character Player, Character Box, or Character Enemy, the difference in types triggers a compilation error if we supply an instance of Character Player to a function expecting an instance of Character Box.
Thus, we are able to prevent all sorts of logic errors caused by supplying the wrong character type to a function.
Direction
There are four directions that a character may move in: up, down, left, or right.
To avoid a name clash with Either's Left and Right constructors, I truncated these direction names to their single character forms:
data Direction = U | D | L | R deriving (Bounded, Enum)
Since enemies are expected to spawn in from a random side and proceed to the other side, I also made Direction an instance of the Random typeclass from the System.Random module:
instance Random Direction where
  random g = randomR (minBound, maxBound) g
  randomR (lower, upper) g = case randomR (fromEnum lower, fromEnum upper) g of (r, g') -> (toEnum r, g')
Screens
There are three screens implemented in the game: the title screen, the help screen, and the game screen. In Haskell, this was naturally modelled as a sum type:
data Screen = TitleScreen | HelpScreen | GameScreen
The use of a sum type also made it easy to implement screen-specific logic using pattern-matching, as seen in the implementation of the handleKeyPress function:
handleKeyPress :: State -> Char -> State
handleKeyPress state@(State { stateScreen = TitleScreen }) 'Q' = state { stateIsQuitting = True }
handleKeyPress state@(State { stateScreen = TitleScreen }) 'P' = state { statePlayer = initPlayer, stateBox = initBox, stateEnemy = initEnemies, stateDifficulty = 1, stateScreen = GameScreen, stateScore = 0 }
handleKeyPress state@(State { stateScreen = TitleScreen }) 'H' = state { stateScreen = HelpScreen }
handleKeyPress state@(State { stateScreen = HelpScreen }) _ = state { stateScreen = TitleScreen }
handleKeyPress state@(State { stateScreen = GameScreen }) 'Q' = state { stateScreen = TitleScreen }
handleKeyPress state@(State { stateScreen = GameScreen }) 'W' = state { statePlayer = updateDirection U (statePlayer state) }
handleKeyPress state@(State { stateScreen = GameScreen }) 'S' = state { statePlayer = updateDirection D (statePlayer state) }
handleKeyPress state@(State { stateScreen = GameScreen }) 'A' = state { statePlayer = updateDirection L (statePlayer state) }
handleKeyPress state@(State { stateScreen = GameScreen }) 'D' = state { statePlayer = updateDirection R (statePlayer state) }
handleKeyPress state _ = state
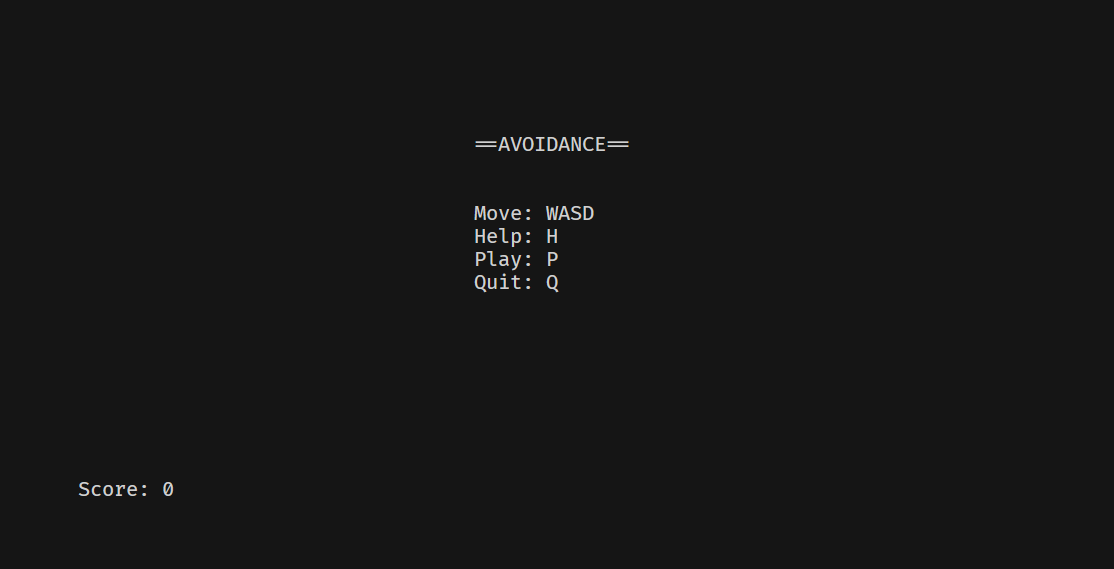
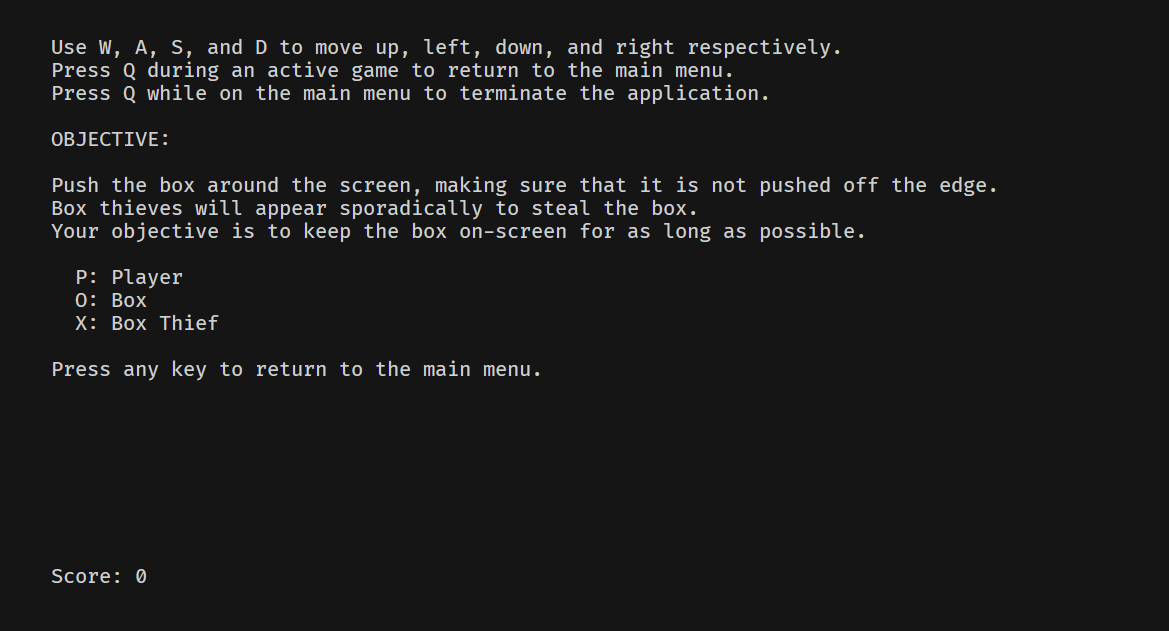
The title and help screens are visible below:
State
The entire game state is wrapped in a single object that is passed into the ansi-terminal-game framework.
This game state type contains the following data:
- The player
- The box
- The list of enemies
- The current difficulty (i.e. the number of enemies)
- The is quitting flag
- The pseudorandom number generator object
- The current screen
- The current score
Here is the implementation in Haskell:
data State = State { statePlayer :: !(Character Player)
                   , stateBox :: !(Character Box)
                   , stateEnemy :: ![Character Enemy]
                   , stateDifficulty :: !Int
                   , stateIsQuitting :: !Bool
                   , stateRandomGen :: !G.StdGen
                   , stateScreen :: !Screen
                   , stateScore :: !Int
                   }
Rendering
The game framework requires a render function gDrawFunction of type s -> Plane that takes in the current state of the game and produces a Plane object.
This Plane object represents the two dimensional console screen where text is drawn to render the game.
Since our game state is represented by the type State, the render function's type is thus State -> Plane.
To render the game, I made use of the mergePlanes function from ansi-terminal-game to combine planes together using the Painter's algorithm, as seen below:
render :: State -> G.Plane
render state@(State { stateScreen = TitleScreen }) = G.mergePlanes drawBlank $ drawTitle : drawScore state : []
render state@(State { stateScreen = HelpScreen }) = G.mergePlanes drawBlank $ drawHelp : drawScore state : []
render state@(State { stateScreen = GameScreen }) = do
  let playerPlane = drawPlayer $ statePlayer state
  let boxPlane = drawBox $ stateBox state
  let enemyPlanes = drawEnemy <$> stateEnemy state
  G.mergePlanes drawBlank $ drawBorder : drawScore state : playerPlane : boxPlane : enemyPlanes
Each rendered entity was also factored out into its own function to make the code easier to read and reuse:
drawPlayer :: Character Player -> (G.Coords, G.Plane)
drawPlayer character = (entityCoords character, G.color G.Blue G.Vivid $ G.cell 'P')

drawBox :: Character Box -> (G.Coords, G.Plane)
drawBox character = (entityCoords character, G.color G.Green G.Dull $ G.cell 'O')

drawEnemy :: Character Enemy -> (G.Coords, G.Plane)
drawEnemy character = (entityCoords character, G.color G.Red G.Vivid $ G.cell 'X')

drawBorder :: (G.Coords, G.Plane)
drawBorder = do
  let outerBorder = G.box '%' (fst bottomRightBoundary) (snd bottomRightBoundary)
  let innerBlank = bimap (+ 1) (+ 1) topLeftBoundary G.% G.box ' ' (fst bottomRightBoundary - 2) (snd bottomRightBoundary - 2)
  (topLeftBoundary, outerBorder G.& innerBlank)

drawScore :: State -> (G.Coords, G.Plane)
drawScore state = ((snd bottomRightBoundary, fst topLeftBoundary), G.stringPlane $ "Score: " <> show (stateScore state))

drawTitle :: (G.Coords, G.Plane)
drawTitle = (bimap (flip (-) 3) (flip (-) 6) centreCoords, G.stringPlane "==AVOIDANCE==\n\n\nMove: WASD\nHelp: H\nPlay: P\nQuit: Q")

drawHelp :: (G.Coords, G.Plane)
drawHelp = (topLeftBoundary, G.textBox "Use W, A, S, and D to move up, left, down, and right respectively.\nPress Q during an active game to return to the main menu.\nPress Q while on the main menu to terminate the application.\n\nOBJECTIVE:\n\nPush the box around the screen, making sure that it is not pushed off the edge.\nBox thieves will appear sporadically to steal the box.\nYour objective is to keep the box on-screen for as long as possible.\n\n  P: Player\n  O: Box\n  X: Box Thief\n\nPress any key to return to the main menu." (fst bottomRightBoundary) (snd bottomRightBoundary))

drawBlank :: G.Plane
drawBlank = G.blankPlane (fst bottomRightBoundary) (snd bottomRightBoundary)
Game Logic
Event Handling
In addition to rendering, the game framework requires a game logic function called gLogicFunction of type s -> Event -> s that updates the game state in response to game events.
There are only two types of events available: Tick and KeyPress.
Both event types have different goals.
KeyPress events are triggered by the player, and should let the player quit the game, access the help screen, or control the character.
Meanwhile, Tick events are triggered on a routine basis by the game, and should be used to update the character positions and score on each tick.
To break up this logic, we can use pattern matching to delegate event types to different functions:
handleEvent :: State -> G.Event -> State
handleEvent state (G.KeyPress key) = handleKeyPress state $ toUpper key
handleEvent state G.Tick = handleTick state
The handleKeyPress event handler is relatively simple, as it merely updates the current state depending on the pressed key and the previous state.
For example, the Q key has different functionality depending on the current game state:
- If the user is on the title screen,
Qterminates the game process. - If the user is on the help screen,
Qreturns the user to the title screen. - If the user is on the game screen,
Qaborts the game and returns the user to the title screen.
Conversely, the handleTick event handler must take care of the following things:
- Character position updates
- Collision handling
- Enemy spawning and positioning
- Score updates
Furthermore, this functionality must run only when the user is on the game screen.
Luckily, this can be implemented quite easily by separating all these concerns out into separate functions, leaving us with the following handleTicks implementation:
handleTick :: State -> State
handleTick state@(State { stateScreen = GameScreen }) = do
  let stateAfterEnemies = handleEnemies state
  let oldPlayer = statePlayer state
  let player = moveCharacter (entityDirection oldPlayer) oldPlayer
  let box = handleCollision player $ handleCollisions (stateEnemy stateAfterEnemies) (stateBox stateAfterEnemies)
  let newScore = stateScore stateAfterEnemies + 1
  if isOutOfBounds box then stateAfterEnemies { stateScreen = TitleScreen }
                       else stateAfterEnemies { statePlayer = resetDirection player, stateBox = box, stateScore = newScore, stateDifficulty = div newScore 200 + 1 }
handleTick state = state
Handling Randomness
The random function exposed by System.Random has the signature (RandomGen g) => g -> (a, g).
This means that it takes in a pseudorandom number generator of type g, then produces a 2-tuple containing the pseudorandom value of type a and an updated pseudorandom number generator of type g.
Thus, repeated applications of random would involve juggling around the pseudorandom number generator object to ensure that different values are produced with each invocation:
let (randomValue1, generator2) = random generator1
let (randomValue2, generator3) = random generator2
To simplify this code, we can replace this pattern with a state monad operating on the pseudorandom number generator.
First, we set the type variable g to StdGen.
Next, we can create a type alias for the state monad so that it carries the StdGen value around as the state:
import qualified Control.Monad.State as S
import qualified Terminal.Game as G

type RandomState = S.State G.StdGen
Finally, we can create some helper functions to generate random values in a safe manner:
randomAction :: (Random a) => (G.StdGen -> (a, G.StdGen)) -> RandomState a
randomAction action = do
  randomGen <- S.get
  let (result, randomGenNew) = action randomGen
  S.put randomGenNew
  return result

randomResult :: (Random a) => RandomState a
randomResult = randomAction random

randomRange :: (Random a) => (a, a) -> RandomState a
randomRange = randomAction . G.getRandom
This lets us generate random values while updating the pseudorandom number generator in a predictable manner.
It also lets us generate either a random value in a type using randomResult, or a random value in a predefined range using randomRange.
Here is an example where randomResult is used within the context of the RandomState character state monad:
createEnemy :: RandomState (Character Enemy)
createEnemy = do
  randomDirection <- randomResult
  position <- enemyStartPosition randomDirection
  return $ Character { entityCoords = position, entityDirection = Just randomDirection }
To execute the RandomState monadic functions, we can use the runState function.
This function lets us retrieve both the final value of the computation and the final version of the pseudorandom number generator so that we can use it for the next tick:
handleEnemies :: State -> State
handleEnemies state = do
  let oldEnemies = stateEnemy state
  let randomGen1 = stateRandomGen state
  let maxEnemies = stateDifficulty state
  let (newEnemies, randomGen2) = flip S.runState (stateRandomGen state) $ randomRange (0, maxEnemies - length oldEnemies) >>= flip createEnemies oldEnemies
  let updatedEnemies = moveEnemies newEnemies
  state { stateEnemy = updatedEnemies, stateRandomGen = randomGen2 }
Putting It All Together
After defining both the game logic and the rendering functionality, we now need to define the initial state and the object passed into the game framework.
The initial state depends on an instance of StdGen, which should be generated by the IO monad on program startup.
Thus, we can define the following two functions:
gameSettings :: G.StdGen -> G.Game State
gameSettings stdgen = G.Game { G.gScreenWidth = fst bottomRightBoundary
                             , G.gScreenHeight = snd bottomRightBoundary
                             , G.gFPS = 15
                             , G.gInitState = initState stdgen
                             , G.gLogicFunction = handleEvent
                             , G.gDrawFunction = render
                             , G.gQuitFunction = shouldQuit
                             }

initState :: G.StdGen -> State
initState stdgen = State { statePlayer = initPlayer
                         , stateBox = initBox
                         , stateEnemy = initEnemies
                         , stateDifficulty = 1
                         , stateIsQuitting = False
                         , stateRandomGen = stdgen
                         , stateScreen = TitleScreen
                         , stateScore = 0
                         }
In the above example, initState takes in an StdGen instance to create the initial state object.
This state object is then used to create the Game State object used by the game framework.
To glue everything together, we just need to define our main method in app/Main.hs:
module Main where

import Game

main :: IO ()
main = getStdGen >>= playGame . gameSettings
This main method first generates an StdGen instance using the IO monad, then feeds it into gameSettings to create the Game State object.
Finally, this Game State object is passed into playGame to run the game.